Backend application documentation
Table of contents
- General info
- Manage users
- Timesheets management
- Reporting
- Extract data to spreadsheet
- Manage projects and clients
This section will explain how to use Punch-in backend application. If you are here, most likely you have been tasked with the administration of the company's time management procedures. Punch-in backend is the place to accomplish the following tasks:
- Keep the list of your users (employees and/or contractors) up to date (i.e. remove old records, modify existing ones and create new records for newcomers).
- Manage the time your employees have logged on each project (approve the hours, correct errors, etc).
- Visualize reports
- Extract data via the export tool
- Keep the list of projects and clients up to date
Each of the above will be explained in the following paragraphs.
General information
This paragraph will explain how the user interface works and how can you personalise it to best suit your needs. We will explain how to filter tables, modify table layout, as well as modify the number of lines that the tool will show per page.
Filters
Filters can be accessed from any table. Click on the "Filters" button and you will be presented with 3 input selectors per filter. The first one selects the table filter you wish to search for (example: creation date greater than 01/01/2022). The second selectors defines the type of search (whcih varies depending on the field type); this can be:
is for an identity search (example: lastName is Smith will only search exact matches)
is not for an identity search that does not match (example: lastName is not Smith will only return last names different from Smith)
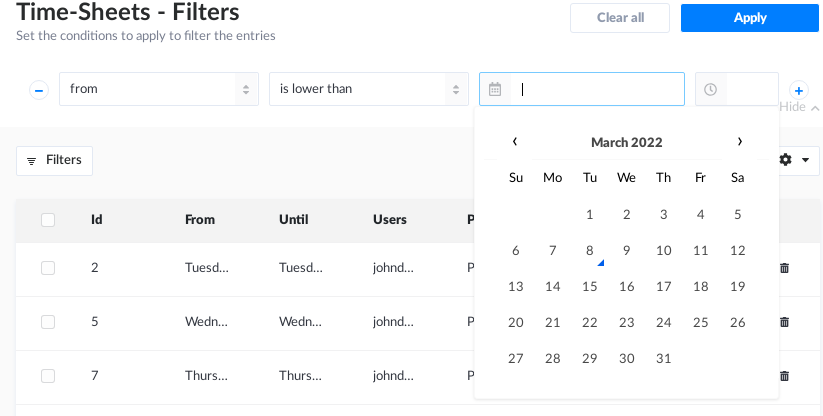
is lower than works best for dates and numbers, searches for values lower than (example show users with a daily rate less than 40)
is lower than or equal to same as above, but will return also values that are equal to the given parameter (show users created on the 01/01/2022 or before)
is greater than works best for dates and numbers, searches for values higher than (example show users with a daily rate higher than 40)
is greater than or equal to same as above, but will return also values that are equal to the given parameter (show users created on the 01/01/2022 or after)
contains (case sensitive) will try to match the string anywhere in the field (example: description contains "work" will return all lines that have the word work in their description, but not Work or WORK)
contains same as above, but it will return all lines that have the word work in their description, including Work or WORK
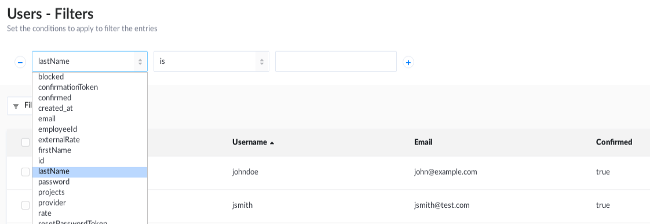
Depending on the type of field, not all filter search types will be available; for example, a boolean field, i.e. a field that can be only true or false, the only allowed search will be is or is not, whilst the search value will be true or false. Likewise, a date field will open a calendar search to simplify entering the date value:
Manage table layout
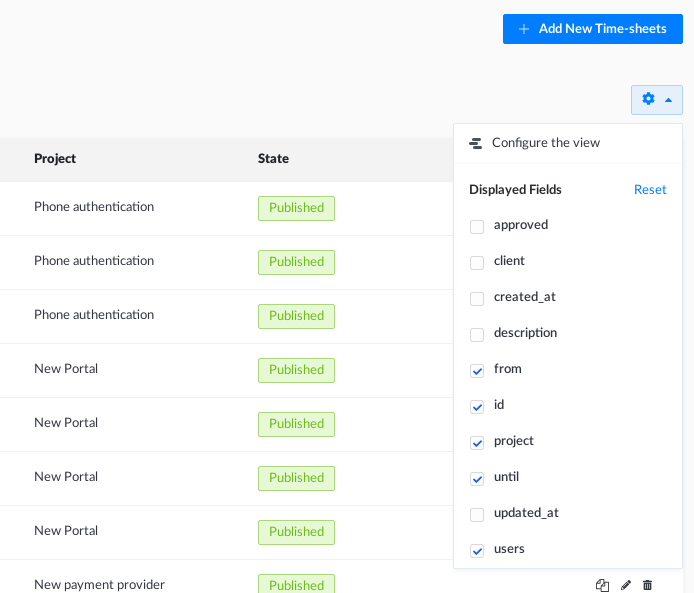
You can customise the way your table layout looks like by adding or removing fields. This is quick and intuitive and available on every table by clicking the cog on the right-hand side of the table top:
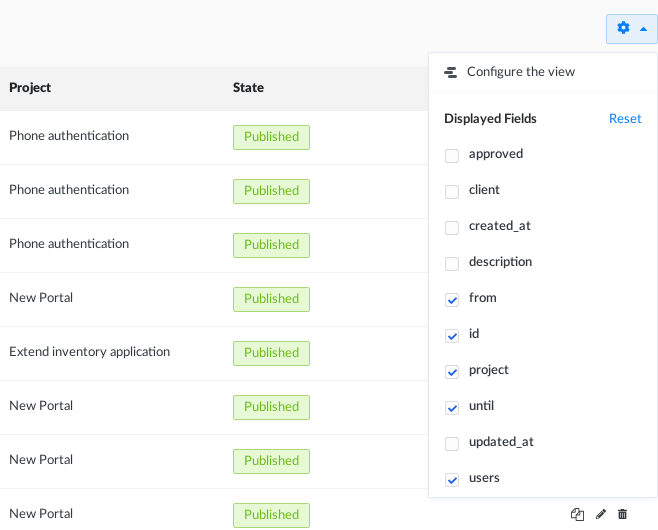
You can add or remove fields just by checking or unchecking the checkbox as show in the picture.
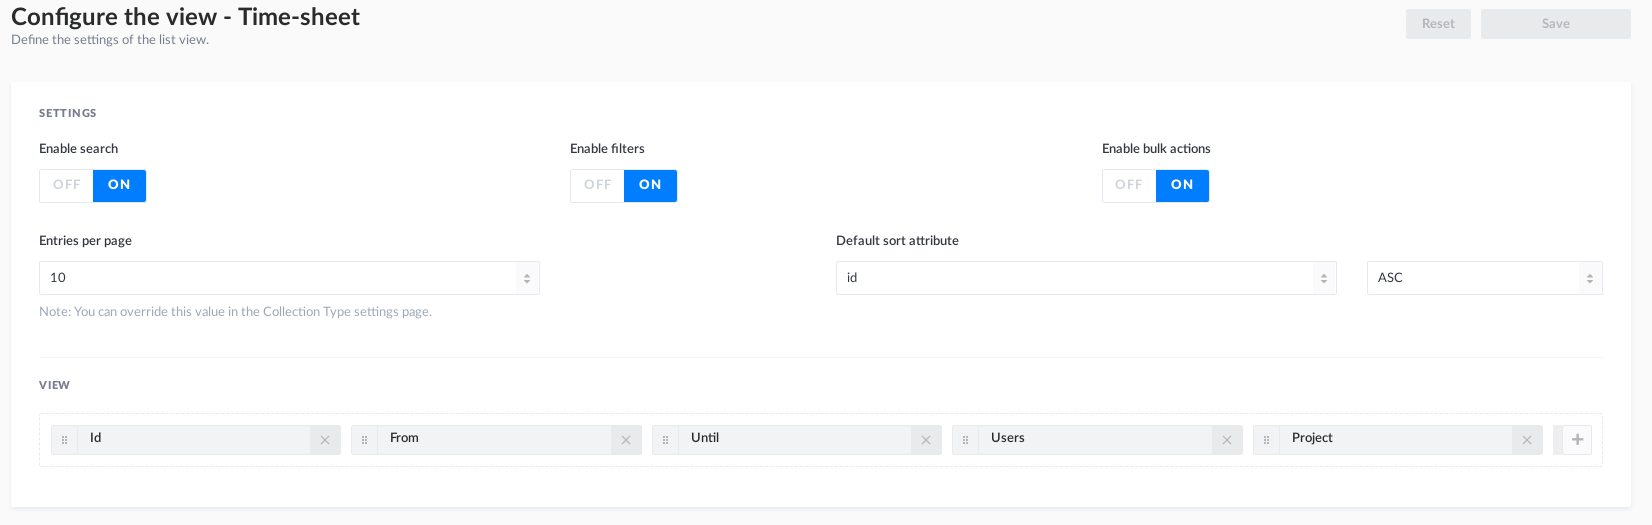
You can also customise further by clicking the "Configure the view" button. You can:
- modify the order of appearance of the fields by changing them in the lower part of the screen, where it says VIEW (see picture below)
- choose the default number of entries for that table
- pick the sorting key (used to put the records in a certain order, for example alphabetical); Default sort attribute allows to pick the field, then you can further choose whether it should be descending (DESC) or ascending (ASC)
- Enable search, bulk actions, filters (by default all set to true): you can restrict searches, filtering and bulk action (i.e. delete multiple rows for example)
Manage users
One of the main activities that needs to be carried out in Punch-in is managing users (employees and/or contractors) profiles. You will need to keep your list of users up-to-date with the changes in your organisation, which consists mainly of the following activities: remove or disable people that have left, amend a user's profile to reflect changes, add a new user.
You can manage users from the users menu as shown below:

Create new user
To create a new user, click on the "Add new user"
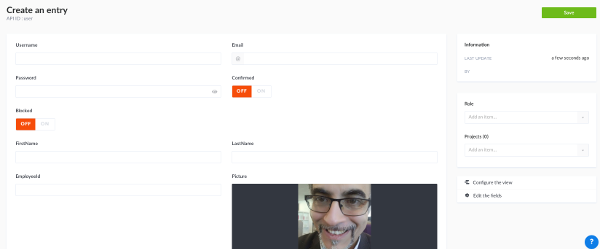
You can fill in as much information as you want, depending on your business needs. It makes sense though to include a user's personal details, like firs name and surname, email address.
Employee id: This field can be used to uniquely identify and reconcile your user against your HR system
Username: This field can be used by the employee to log onto the tool (not yet in use at the moment)
Rate: This field is used to store the person's hourly rate. It is used to work out how much are you paying the user per hour
External Rate: How much you are billing your customers for the employee's hours
Confirmed: This is meant to be used when external account creation is allowed, which the tool does not support at the moment
Picture: This is the tool from which you will be able to select a user's picture. Upload it from here. Note: It is very important to have a well taken picture, high resolution, passport-like picture, without glasses, hats, scarf or other objects hiding the face and hair; there should not be any glows of light, too dark or too bright.
On the right-hand side there are additional options that you may find useful:
Information: it shows who and when was the record last updated
Role: the tool allows to define multiple roles with different levels of access. By default users should have the authenticated role to allow future enhancements
Projects: from this option you can add projects to a user, allowing them to book hours against it. A user can have multiple projects.
Modify existing user
To modify a new user's details, firstly click on the user from the users list table (left-hand menu / users). To find the user's details may want to use the filter facility:
The left most field represents the field that you want to search, the middle field the type of search, and the last field will contain the string that you wish to look for. Depending on the type of field, different search types will take place. Example: if you want to know all users that have been created before 01/01/2022, you'd select created_at - is lower than - select from calendar widget 01/01/2022
Once the right user has been selected, by clicking on it, all details appear on screen and you can update any property. When you are finished, just click the SAVE button.
Delete or disable user
If you wish to completely delete a user, just select it and click on delete selected:
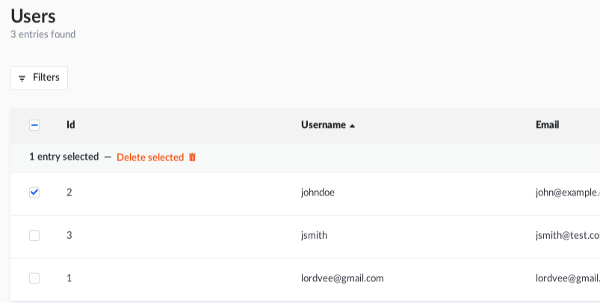
You may also delete the user by clicking on it so that the details open up and then click on the "delete this entry" link on the bottom right.
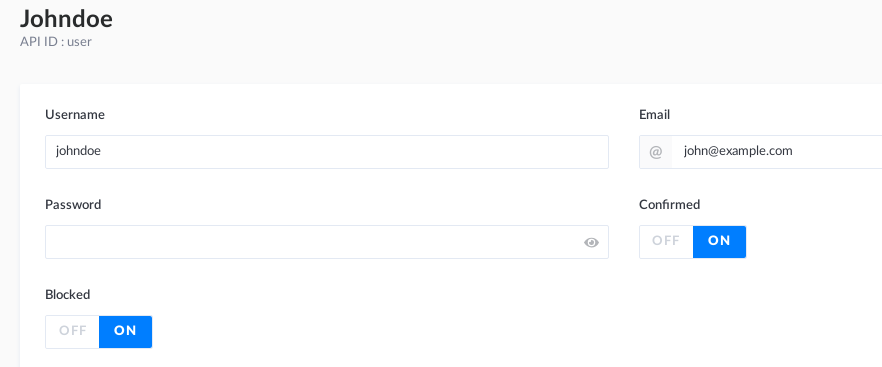
Sometimes you may just wish to temporarily remove the user from the system. If this is the case, just select the user and check the blocked radio button:
Manage time sheets
You can access time sheets from the left-hand menu Time-sheets. As for the users table, you can filter out results using the same principles. This is especially useful when you need to only select a certain time frame. You can also add more filters which act as a logical AND. So, for example, you can filter all time sheets from a certain date AND a certain other date (From is greater than... AND Until is lower than... AND project is...)
Normally there should not be a lot to do with time sheets except approve them or reject them. In rare cases you may need to delete or amend them. You may delete them by selecting them from the list and then click on the "delete selected" link. You may also delete the entry by clicking on it so that the details open and then click on the "delete this entry" link on the bottom right.
A useful feature is the table details layout configuration, which can be modified to include/exclude any field from the table representation:
Reporting
Punch-in is delivered with the following reports out of the box:
- average worked time - you can select the project vs total time
- worked time total - the sum of all worked hours
- total worked hours per client/project per unit of time - same as above, but per project/client
- worked hours per user per project - visually check how much each user contributed per project
- average start time - when are your employees commencing work, per project and total
Extract data
You can extract all data visible on screen by clicking on the Export and Export all
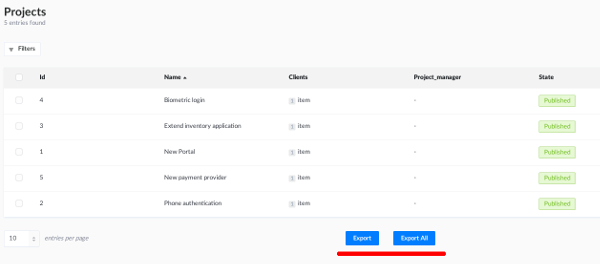
You can extract all data visible on screen by clicking on the Export and Export all
Manage projects and clients
Punch-in has been conceived to allow for Clients to have multiple projects and for Projects to have multiple clients. Clients is the reference entity for the purposes of billing, whereas Projects are the operational center of activities. As for the other tables, a Client can be created, modified or deleted.
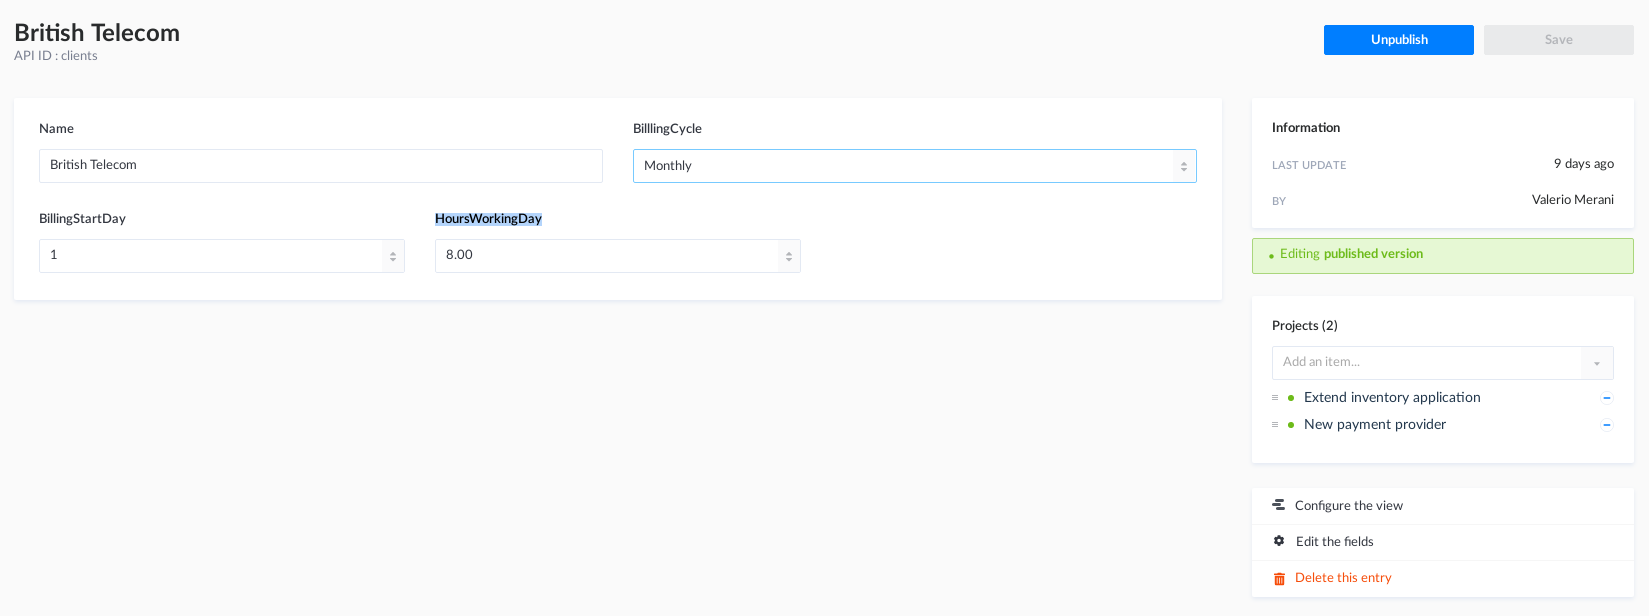
When creating a new Client, the following fields are relevant:
- Name: your client's name
- BillingCycle: relevant for billing purposes, can be weekly, fortnightly, monthly
- BillingStartDay: this is the cut off date and is a number between 1-30. If the client requires the billing to happen at a certain date, this is the field to edit.
- HoursWorkingDay: defines the max number of hours that the client defines for a working day
From the bottom right corner, new projects can be added to the client.
Projects can be created by clicking the "Add new Projects" button, where the following screen will appear:

When creating a new Project, the following fields are relevant:
- Name: your project's name
- Budget: the estimated budget to accomplish the project
Each project can have a Project manager designated (add or remove from the Project_manager field below the Clients link). In order to add a project manager, you need to create their profile from the Users table.